
Currently Empty: £0.00


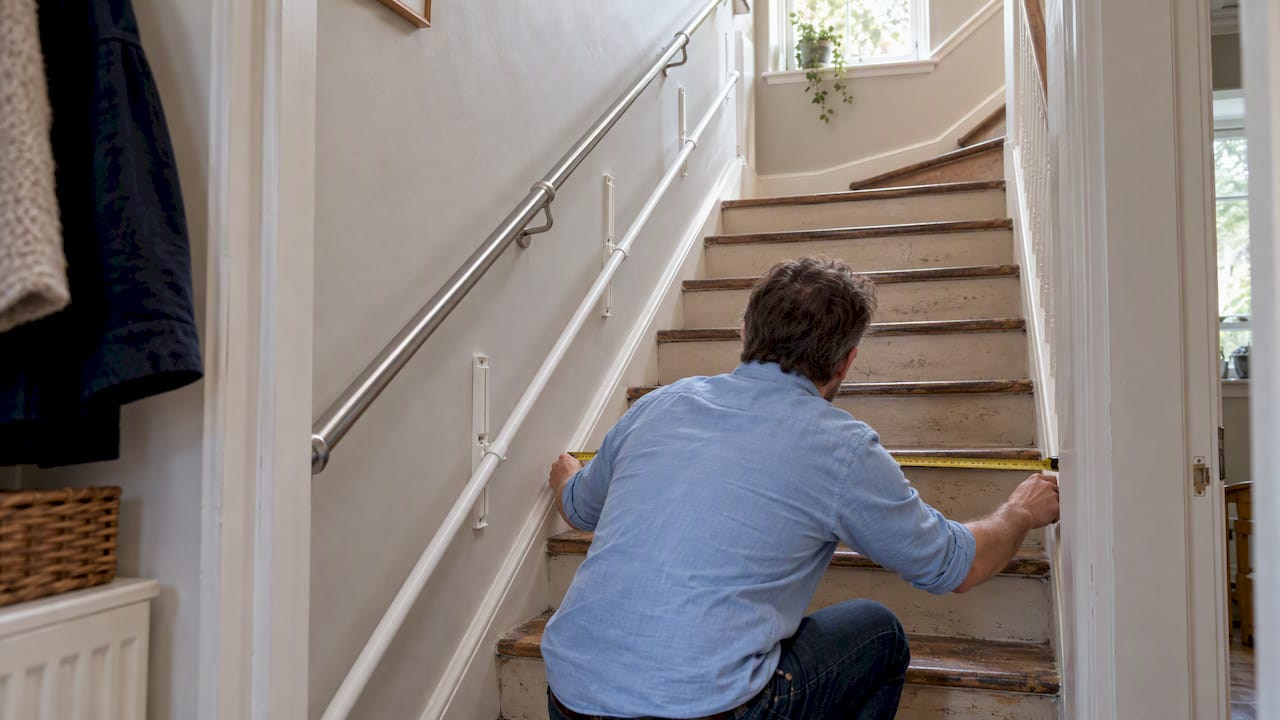
For wide stair flights, the effective solution is a continuous, child-height adjustable rail set between 600 and 750 mm above the pitch line. For long or very wide runs, pair the rail with extension packs or divide the flight into two separate rails so a child is never more than an arm’s reach from a grip.
TL;DR:
- Very wide flights over 2.3 m should be divided into sections roughly 1.1 to 1.8 m, using a second rail or intermediate support.
- Measure stair width at several points and total length including landings; 85 cm and 170 cm extension packs suit moderate and longer runs.
- Fix brackets into studs or masonry, or secure a backing board to spread the load; plaster alone can loosen under repeated pulling and leaning.
- Check fixings weekly and inspect extension joins monthly; tighten loose screws promptly and replace any cracked or splintered rail section.
Table of Contents
- What to check before choosing a wide-stair child handrail
- Measuring your staircase and planning the rail layout
- Fitting an adjustable child handrail on a wide staircase
- Keeping a child handrail safe over time
- Why child-height rails matter most on the way down
- Fitting an adjustable rail to different wide stair shapes and materials
- Adjusting the handrail height as your child grows
- Adjustable rails versus fixed handrails for wide stairs
- Extension packs and accessories for longer, wider runs
- What families say about fitting a rail on a wide staircase
- Backing boards and the basics of a secure install
- Why we built KiddieRail around adjustability for wide stairs
- Get a KiddieRail adjustable handrail for your stairs
- FAQ
- Sources
What to check before choosing a wide-stair child handrail
Not every child handrail suits a wide flight. Before buying, run through a short checklist so the rail you fit actually does its job.
- Height adjustability: the rail should sit within 600–750 mm above the pitch line and move as your child grows, matching the lower rail guidance in universal design standards for children’s settings.
- Continuous grip: no gaps where a hand would have to let go, especially at newel posts or turns.
- Extension availability: a modular system that adds length without buying a whole new rail.
- Fixing compatibility: brackets that work with a backing board or stud fixing rather than plaster alone.
- Grip diameter and surface: a slim, tactile profile a small hand can close around.
- Visual contrast and end extensions: a rail that stands out from the wall and runs roughly 300 mm past the top and bottom step.
On a wide flight, dividing the stair or adding extension packs keeps every section of the clear width within reach of a grip, rather than leaving a gap in the middle of the stair where a child has no support at all.
Measuring your staircase and planning the rail layout
Start with the pitch line, the imaginary line running along the nose of each step. Measure your child’s shoulder or elbow height while standing on a few steps to judge comfortable reach, then plan the layout before you buy fixings.
- Measure the clear width between walls or existing handrails at several points along the flight.
- Measure the total flight length, including any landings, to know how many rail lengths or extensions you need.
- Check your child’s height and mark a trial mounting point, keeping it within 600–750 mm, or the 665–750 mm range used in the NCC housing provisions for settings used by children, and leave room to raise it later.
- Compare your clear width against the guidance to divide very wide flights, generally those over 2.3 m, into sections of roughly 1.1 to 1.8 m, as set out in the Scottish building standards technical handbook.
If your flight is wider than one of those sections, plan for a second lower rail or an intermediate support rather than stretching a single rail across the whole width. Our guide on tested mounting ranges for child handrails walks through this in more detail for different stair shapes.
Pro Tip: Mark your trial height with masking tape and watch your child use the stairs for a day before drilling: a few millimetres makes a real difference to grip comfort.
Fitting an adjustable child handrail on a wide staircase
Good preparation avoids most of the problems parents run into with stair rails. Locate wall studs or solid masonry before you drill, and if your wall is plasterboard over battens, plan for a backing board rather than relying on plaster plugs alone, since plaster-only fixings loosen under the repeated pulling and leaning a child rail takes.
- Mark your chosen height, 600–750 mm above the pitch line, at both ends of the run and check it stays level, or follows the pitch, along the stair.
- Fit the backing board or stud-located brackets first, then attach the rail so it extends around 300 mm beyond the top and bottom step where the layout allows.
- Leave a clearance of roughly 38 to 50 mm between the rail and the wall, following the manufacturer’s bracket spacing, so small fingers and a full hand grip both fit comfortably.
- When adding an extension pack, support the join with an intermediate bracket rather than letting two lengths meet unsupported, and add a mid-run support on any flight long enough to need one.
- Check the finished rail for continuity (no gaps a hand would need to release for), firmness under load, a smooth grip diameter and no sharp edges at joins or end caps.
Pro Tip: Fit the rail, then have your child use the stairs while you watch from below: a wobble under their hand is the clearest sign a bracket needs tightening.
A working, properly placed handrail is one of the clearer protective factors identified for child stair falls, with a multicentre case-control study linking functioning handrails and correctly used gates to lower odds of injury, and some combinations of measures potentially preventing between 5% and 24% of incidents, rising to around 45% in some gate-related scenarios. For a practical guide to combining a rail with a gate on a wide opening, see our notes on fitting a secure gate alongside a child rail.
Keeping a child handrail safe over time
A rail fitted correctly on day one can still loosen or wear, especially on a flight used dozens of times a day by a small, enthusiastic grip.
- Weekly: check for movement in the fixings, run a hand along the rail for splinters or worn patches, and confirm the surface still feels tactile rather than slick.
- Monthly: inspect any extension joins for gaps, confirm mid-run supports are still solid, and check the paint or finish still contrasts clearly against the wall.
- As needed: tighten loose screws immediately, add a backing plate if a fixing point has started to work loose in the wall, and replace a cracked or splintered section rather than patching it.
Call in a professional, or replace the affected section, if you find a bracket has pulled away from a stud or if the wall itself shows signs of damage behind the rail.
Pro Tip: Keep a small screwdriver near the stairs: tightening a loose bracket takes two minutes and is the single most common fix a child rail needs.
Why child-height rails matter most on the way down
Stair falls are a genuine, common cause of childhood injury at home, and the mechanics of a fall explain why height and continuity matter so much. Research on stair design and user interaction identifies descent as the riskiest phase of stair use, since a continuous graspable rail gives a person, including a small child, something to arrest a slip before it becomes a fall.
A few practical triggers tell you it is time to add or adjust a rail rather than wait:
- Your child has started descending stairs independently, even occasionally.
- Your flight is wider than the sectioning guidance in the Scottish technical handbook, meaning part of the width has no rail within reach.
- You have noticed visible instability on the stairs or a near-miss, even a minor one.
The same case-control study found that working handrails on all stairs, combined with correctly used stair gates, were associated with meaningfully lower odds of injury, reinforcing why a continuous lower rail, fitted at the right height, is worth prioritising over a rail that only serves adult users.
Fitting an adjustable rail to different wide stair shapes and materials
Wide flights come in more shapes than a simple straight run: dog-leg stairs, winders, open-tread designs and stairs with a half-landing all turn up in family homes. An adjustable rail needs to cope with these without leaving a dead zone where the grip is interrupted.
On straight wide flights, a single rail length plus an extension pack usually covers the run in one continuous line. On a dog-leg or stairs with a landing, the rail needs a bracket or joint at the turn so the grip continues around the corner rather than stopping at the newel post. Open-tread or glass-balustrade stairs often lack a solid wall to fix to, so a backing board becomes the practical route to a secure, rigid mount rather than relying on the balustrade itself.
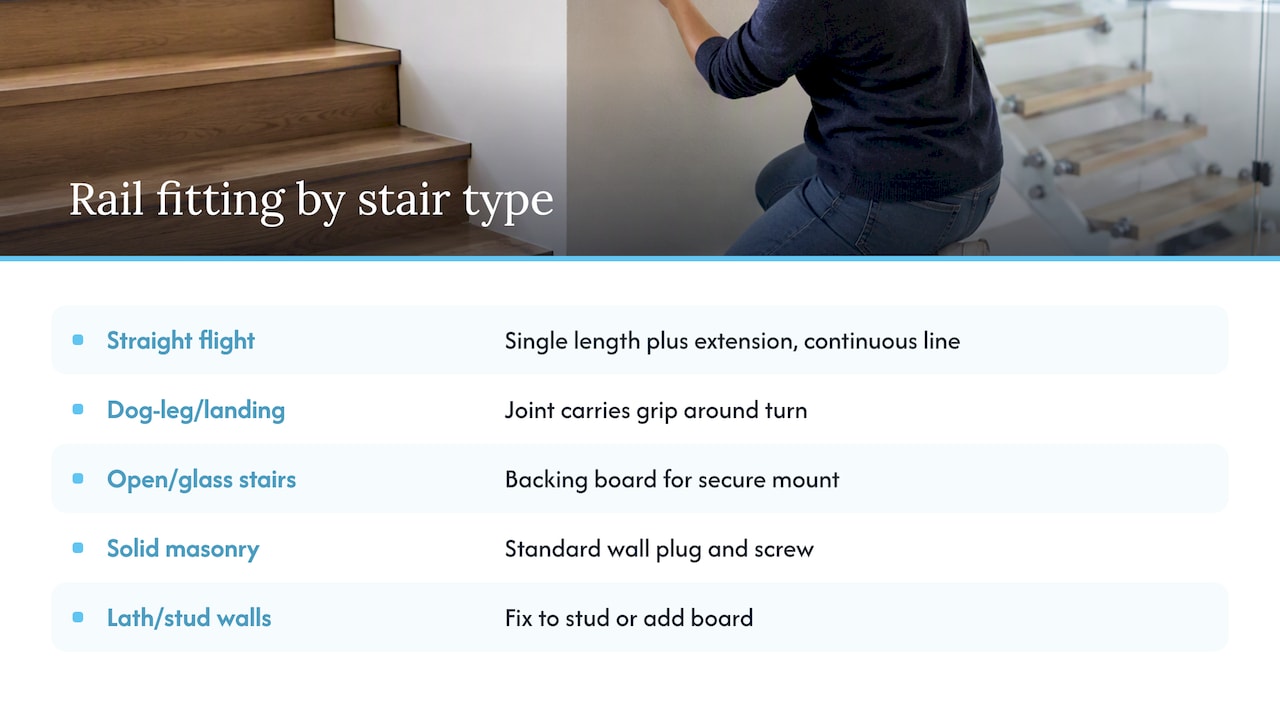
Wall material also affects the fitting approach. Solid masonry takes a standard wall plug and screw combination well. Older lath-and-plaster walls or stud partitions need the fixing located on a stud or backed with a board, since plaster alone will not hold a rail that takes repeated pulling and leaning from a child’s weight. Our guide to fitting a handrail backing board and choosing 85 cm or 170 cm extensions covers this for the layouts that come up most often, including how to decide between a single run with extensions and a divided, two-rail approach for the widest flights.
Adjusting the handrail height as your child grows
An adjustable rail earns its name by moving with your child rather than being replaced every year or two. The practical process is straightforward, and doing it on a schedule keeps the rail useful for longer.
Start by checking the current height against your child’s shoulder or hip level every few months, since growth spurts can shift the comfortable reach noticeably between checks. Recheck the wall clearance, generally 38 to 50 mm, since raising the rail slightly can change how it sits against the wall at corners or returns.
Keep a note of the date and height each time you adjust it, so you are not guessing at the next check. Our detailed placement notes on tested mounting ranges for child handrails set out the specific bracket positions for common age and height ranges, which is useful if you prefer a reference point rather than relying on eye level alone.
Adjustable rails versus fixed handrails for wide stairs
A fixed, non-adjustable child rail solves the problem for exactly the height range it was installed at, and then stops solving it. Children grow quickly in the early years, and a rail set for a three-year-old is often too low to be comfortable, or even visible, for the same child at six.
An adjustable rail avoids that cliff edge. Rather than removing and reinstalling a fixed rail, or living with one that no longer matches your child’s reach, you move the existing rail to a new height within the 600–750 mm range and keep using the same fixings and backing board. On a wide stair this matters more than on a narrow one, because a wide flight often needs an extension pack or a second rail section, and replacing an entire fixed run across that width is a bigger job than repositioning brackets on an adjustable one.
Fixed rails can also be harder to retrofit with extensions, since many are a single fixed length. An adjustable system built around modular lengths lets you add an extension pack later if you move house, extend a landing or simply measured conservatively the first time.
Extension packs and accessories for longer, wider runs
Few staircases are a single standard length, and wide or long flights are exactly where a modular approach pays off. Rather than ordering an oversized custom rail, an extension-based system lets you build the exact length your stair needs.
The KiddieRail Adjustable Child Stair Handrail forms the base run, and two extension packs extend it for longer flights: the KiddieRail Extension Pack adding 85 cm suits a moderate extension on a single long run, while the KiddieRail Extension Pack adding 170 cm covers a much longer flight or a run that includes a landing. Combining packs lets you match the rail length to your measured clear width rather than settling for whatever a fixed-length product happens to offer.
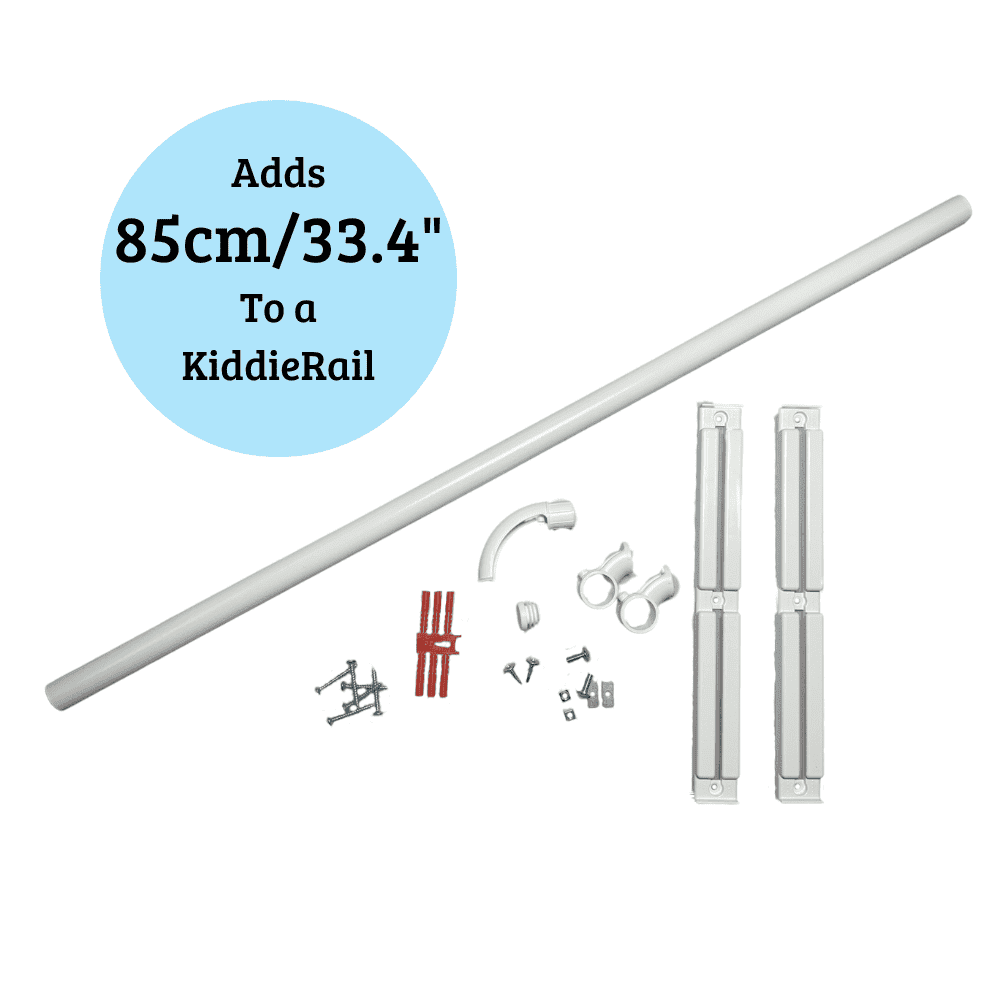
For very wide flights that call for dividing the stair into sections, as suggested by the sectioning guidance for flights over 2.3 m, extension packs also let you build two separate shorter runs rather than one long one, each supported with its own mid-run bracket. Full details on stock and pricing sit on our accessories category page.
What families say about fitting a rail on a wide staircase
Wide staircases come up again and again as the layout parents find hardest to solve with a standard child rail, simply because a single short length rarely spans the whole run. Families fitting a rail on these flights consistently report that the main benefit is confidence: a child who can reach a grip across the entire width of the stair, not just the half nearest one wall, tends to use the stairs more steadily and needs less hovering from an adult standing behind them.
The practical lesson from these installs is less about the rail itself and more about planning the layout first: measuring the clear width, deciding where an extension join or a second rail section needs to sit, and fixing into a stud or backing board rather than plaster alone. Getting that groundwork right before fitting is what makes the difference between a rail that feels solid under a child’s full weight and one that works loose within a few months. Our guide for measuring and fitting a child rail in childminder settings covers the same groundwork for anyone managing a stair used by several children of different heights.
Backing boards and the basics of a secure install
A backing board is the single most useful addition for anyone fitting a child rail to an older or less solid wall, and it is worth deciding on one before you drill the first hole. The board spreads the load from the rail brackets across a wider section of wall, rather than relying on a handful of individual fixing points to take the full strain of a child pulling or leaning on the rail during descent.
Choose a board long enough to cover the bracket spacing for your chosen rail length, and fix it into studs or solid masonry rather than plasterboard alone. Once the board is secure, the rail brackets attach to it at your measured height, typically within 600–750 mm, with roughly 38 to 50 mm of wall clearance for a comfortable grip. For a wall where studs do not line up conveniently with your bracket spacing, a backing board solves that mismatch without needing to resite the whole rail. Our dedicated guide on fitting a backing board and choosing 85 cm or 170 cm extension lengths walks through the board sizing in more detail, including how it interacts with extension joins on longer runs. For wall clearance specifics that apply to grip space on narrower landings, our wall clearance checklist is a useful companion reference, and good stair lighting from practical stair lighting ideas helps a child see the rail clearly on darker landings too.
Why we built KiddieRail around adjustability for wide stairs
We designed the adjustable mechanism specifically because wide stairs rarely fit a single fixed height or a single fixed length. Testing the rail under repeated child use, rather than just static load, shaped how the brackets and extension joins are built. We keep refining the fit based on how families actually use their stairs, not just how a rail performs on a bench.
— Paul
Get a KiddieRail adjustable handrail for your stairs
A continuous, adjustable rail set between 600 and 750 mm solves the wide-stair problem properly: it reaches your child at the right height now, and moves as they grow, without needing a full replacement in a year or two. For longer or very wide flights, extension packs let you build the exact run your stairs need rather than compromising on length.

The KiddieRail Adjustable Child Stair Handrail is the base unit for any installation, and the two extension options, the 85 cm Extension Pack and the 170 cm Extension Pack, both typically priced in the range of £25 to £37 as a one-off cost, let you extend a single run or divide a wide flight into two supported sections. Browse the full accessories range to put together the exact combination your staircase needs.
FAQ
What height should a child handrail be on a wide staircase?
Guidance for children’s settings recommends a lower rail positioned between 600 and 750 mm above the pitch line, with some standards specifying 665 to 750 mm for settings used by children. The exact height within that range should suit your own child’s reach and be adjusted as they grow.
Does a wide staircase need more than one handrail?
Very wide flights, generally those over 2.3 m, are often divided into sections of roughly 1.1 to 1.8 m so no part of the stair is left without a rail within reach. On a flight that wide, two shorter rails or one rail plus a central support generally work better than a single long run.
Why does a child need a handrail separate from the adult rail?
Standard adult handrails typically sit far above a young child’s reach, so a dedicated lower rail gives them something to grip during descent, the phase research on stair use identifies as the riskiest. A case-control study also links working handrails and correctly used gates to lower odds of child stair injury.
How do I know if my wall can take a child handrail safely?
Check for solid masonry or wall studs along the planned rail route, since plaster alone will not hold firm under the repeated pulling and leaning a child rail takes. Where studs are not well placed, fitting a backing board spreads the load and gives a secure base for the brackets.
Sources
- Vertical circulation: stairs | Universal design for early schools and care settings
- Stair design and user interaction
- Risk and protective factors for falls on stairs in young children: multicentre case–control study
- 4.3 Stairs and ramps – Building standards technical handbook 2022: domestic


