
Currently Empty: £0.00


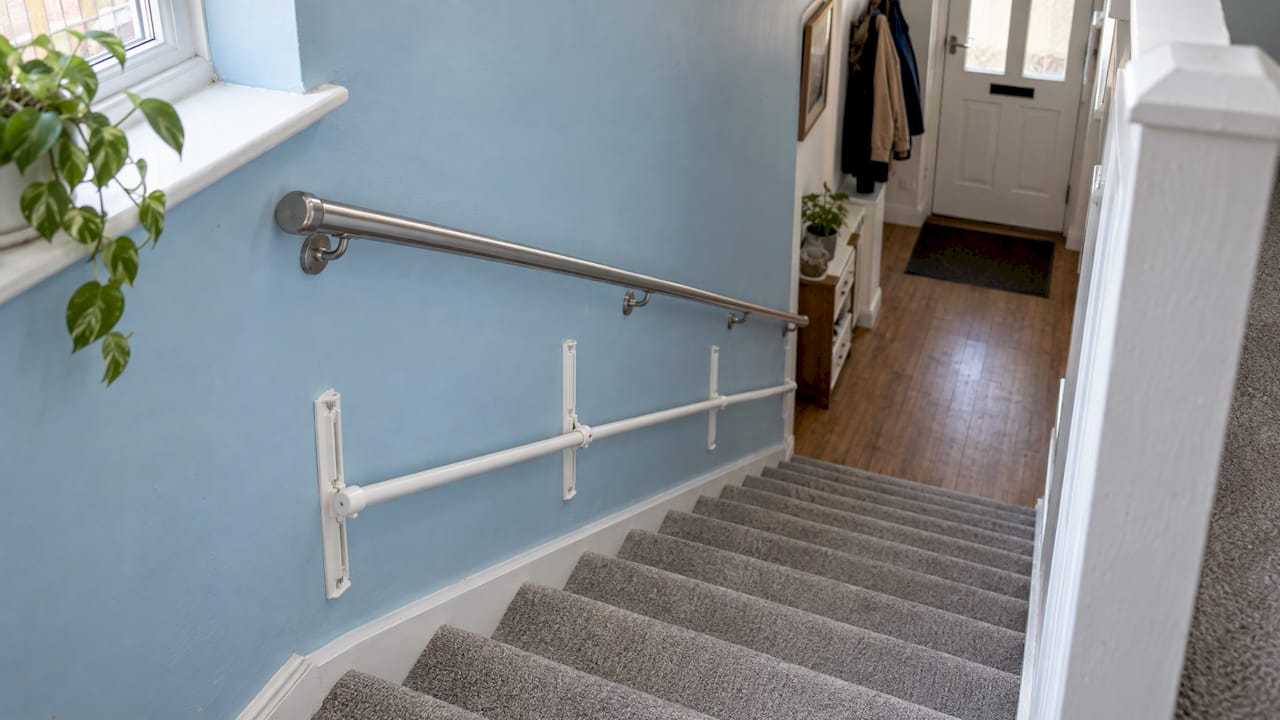
You can add a child-height handrail to stairs you already have without replacing the banister or the staircase. The rail sits below the adult handrail, at a height a toddler can reach and grip, and is fixed to the wall or the existing structure. Measure the flight, choose a height that suits your child, fix into solid backing and check it before the first use. This guide covers each of those steps for UK homes.
TL;DR
- A retrofit child handrail is a lower second rail added beneath your existing handrail, so a small child can hold on at their own height.
- Most child rails for the home sit at roughly 600 to 750 mm above the stair nosings. Match the height to your child’s reach and re-adjust as they grow.
- Fix into a stud, masonry or a backing board, never into plaster alone, and give the rail a firm pull test before use.
- A handrail supports a child who is walking the stairs. It sits alongside stair gates and supervision and does not replace them.
- Measure the stair flight first, including the length you need to cover and any turns or landings, so you buy the right rail and extension pack once.
Table of Contents
- What a retrofit child handrail is
- Check your stairs before you buy
- Choosing the height and length
- Fixing it securely
- UK rules and what they mean for you
- What to use alongside a child handrail
- Our view on retrofitting
- Get the right KiddieRail for your stairs
- FAQ
- Sources
What a retrofit child handrail is
Standard handrails are built for adults. On most UK staircases the main rail sits well above a toddler’s shoulder, so a two-year-old has nothing to hold except the spindles or the wall. A retrofit child handrail fixes that without any building work: it is a second, lower rail that you add to the stairs you already have.
The idea is not new. A US patent issued in 1998 describes a secondary handrail for children that mounts on an existing handrail, with telescoping rods so the length and distance from the stairs can be set for a particular child. Modern designs differ in detail, but the principle is the same: a lower rail, adjustable to the child.
Our KiddieRail is built on that principle. It is an adjustable child stair handrail that fits below a standard handrail, and it is designed to grow with your child rather than be outgrown in a year. It is made for self-installation on any home staircase layout.
Why a lower rail matters
Stairs are a real hazard for small children. A 2016 BMJ-published case-control study reports that falls from stairs or steps made up 18% of emergency department attendances for falls among under-5s in England and Wales, and 12% of admissions for falls. The same study links falls to missing or open stair gates, which is why we treat a handrail as one layer of a plan rather than the whole plan (more on that below).
A rail at the right height also helps a child learn. Once a child starts climbing on their own, RoSPA’s advice on stairs stresses keeping stairs clear of clutter and making sure balustrades are strong. Giving a toddler something safe to hold at their own height fits naturally with that.
Check your stairs before you buy
Ten minutes with a tape measure saves a return later. Work through these points.
- Count the flights. Straight flight, flight with a turn, or a landing partway up? Each section needs rail along it.
- Measure the length of the rail you need. Measure along the pitch line, from the first nosing to the last, for each side you plan to fit.
- Look at what the rail will fix to. Solid brick or block, a timber stud wall or a plasterboard wall that needs a backing board.
- Check the existing handrail. If it is loose, splintery or incomplete, sort that first. A child rail does not fix a wobbly adult one.
- Note the stair width. On wide stairs you may want a rail on each side or a split arrangement. We cover this in our guide to wide stair child handrails.
- Look at landings. The same BMJ study found that not having a landing part-way up the stairs was associated with falls, so extra care on long straight flights is sensible.
Walls, banisters and open-sided stairs
A wall-side stair is the simplest case: the rail fixes straight to the wall. Open-sided stairs with spindles are trickier, because there may be nothing solid to screw into at the right height. In that case, fixing options differ, so read our page on wall mounted child handrails before you decide where the rail goes.
Choosing the height and length
The right height is the one your child can grip comfortably with a relaxed, slightly bent arm, measured vertically from the stair nosings (the front edge of each tread).
Guidance abroad gives a useful reference point. The US Access Board advises that where children are the main users, a second set of handrails should be no higher than 28 inches (710 mm) above the stair nosings, with at least 9 inches (230 mm) of clearance between the rails. That guidance is for public facilities in the United States, not UK homes, but it shows how a lower rail is normally set against the main one.
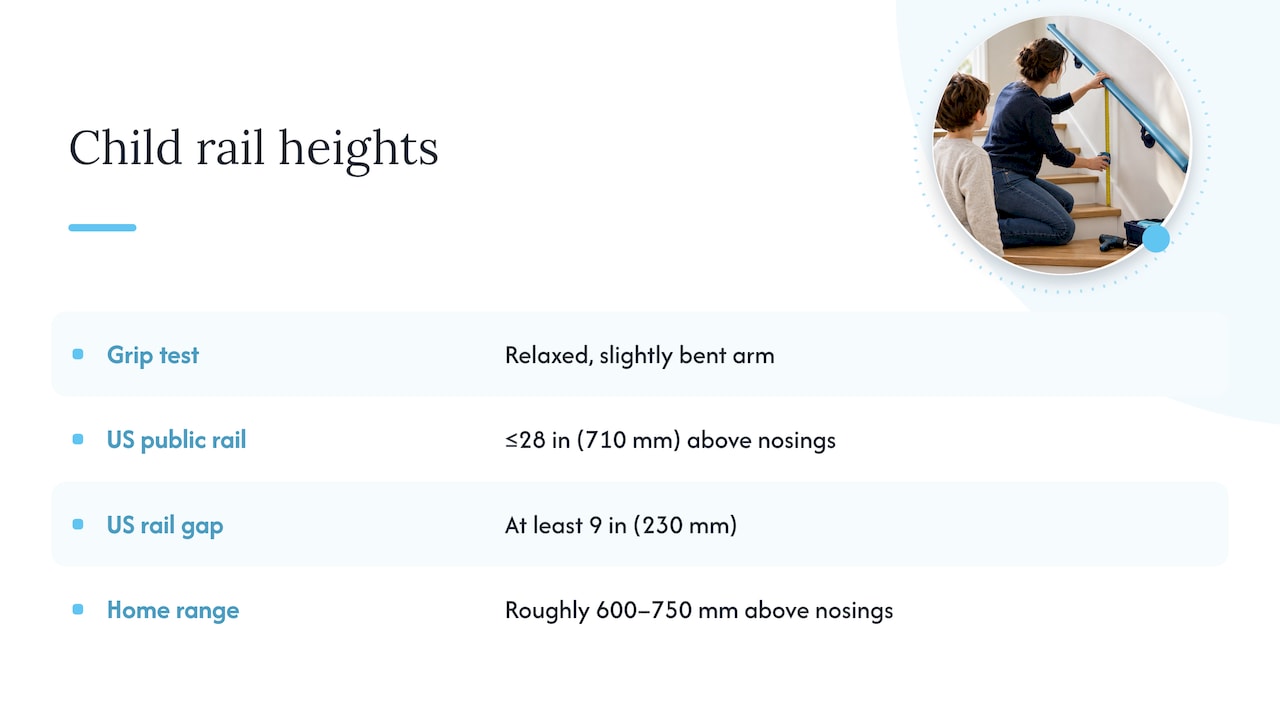
For a home, our own adjustable range is set up for roughly 600 to 750 mm above the nosings. That spans the reach of most toddlers and young children as they grow. The detail of where to place the rail along the stair is in our guide to handrail placement for kids, and our page on handrail height for kids covers what works on UK stairs.
A quick way to set it
- Stand your child on the second step with their arm relaxed.
- Ask them to reach out naturally and hold something at a comfortable height.
- Measure from the nosing line up to their hand.
- Set the rail there, then check it again every few months.
Because the rail is adjustable, you are not locked into a height that suited a toddler and fails a five-year-old.
How long should the rail be?
Longer is generally better, because a child who loses grip at the top of a flight needs rail all the way down. If your stairs are longer than the standard rail, extension packs fill the gap. We sell two sizes: one adding 85 cm and one adding 170 cm. Our extension packs cost from £24.99 to £36.99 as a one-off, depending on the length you choose. You can see them on the extension pack page.
Fixing it securely
A child will put their full weight on a rail, sometimes suddenly. The fixing matters more than the rail.
Find solid backing
Plasterboard alone will not hold a falling child. Family Handyman’s installation guide advises locating and marking the studs, drilling pilot holes and fastening brackets to the framing. On masonry walls, use the correct plugs for the wall type. If the studs do not line up with where you want the rail, a timber backing board spreads the load, and we explain how to choose and fit one in our guide to the handrail backing board.
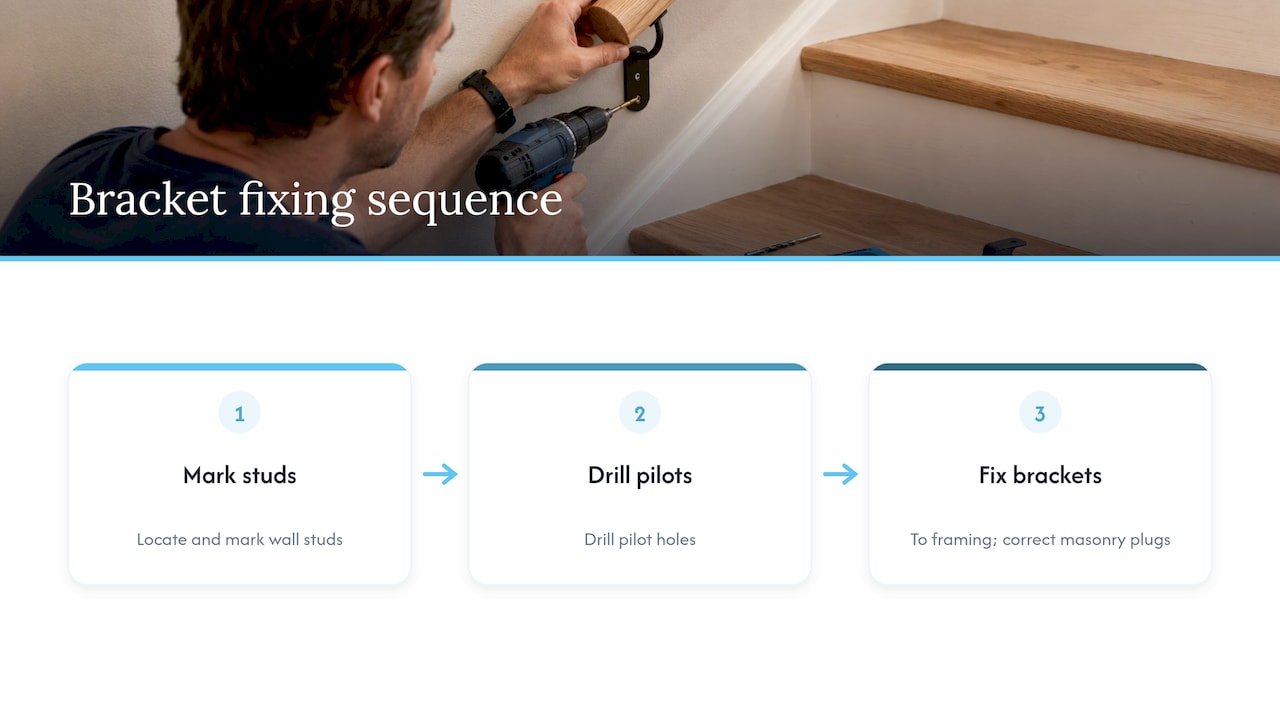
Bracket spacing
Family Handyman suggests two brackets at the top, one at the bottom and one every 48 inches between for a full-size stair handrail. For a lighter child rail, follow the fixing instructions supplied with the product, and when in doubt add a bracket rather than leave a long unsupported span.
Materials and grip
Smooth, rounded rails are easiest for small hands. Our page on handrail materials for kids goes through the options and why gaps matter. Whatever you fit, run a hand along it for splinters or sharp edges.
Install it step by step
- Measure the stair and mark the height line at your chosen height above the nosings.
- Locate studs or masonry along that line.
- Mark the bracket positions and drill pilot holes.
- Fix the brackets firmly and attach the rail.
- Check the rail is level with the stair pitch and aligned along its length.
- Pull and push it hard, as a child might. Nothing should move or creak.
- Retighten after a week, as fixings can settle.
The full walk-through, including choosing a rail type, is in Adjustable Child Handrail: How to Choose and Fit One.
UK rules and what they mean for you
Building regulations apply mainly to new work and structural changes. In England and Wales the relevant guidance is Approved Document K, which sets handrail and guarding requirements for the main stair, and Scotland has its own Technical Handbook with slightly different figures. A lower child rail is an addition beneath the main rail, so check that it does not leave a gap that a child’s head could pass through. The widely used safety benchmark is that openings should not let a 100 mm sphere through, and InterNACHI notes that balusters more than 4 inches apart can allow a child to slip through and become trapped.
If you rent, ask your landlord before drilling. If you are doing wider stair work, such as replacing the banister, talk to your local authority building control. If you are a childminder, your inspector may have views on stair safety, and our page for childminders and daycare settings covers this use.
What to use alongside a child handrail
No single product makes stairs safe. Combine measures.
- Stair gates. Ottawa Public Health recommends a wall-screwed gate at the top of the stairs and a pressure-mounted gate at the bottom. RoSPA advises wall-mounted gates at the top and bottom for children under 24 months. The BMJ study found that parents of children who fell were more likely not to have stair gates or to leave them open.
- Clear stairs. Keep steps free of toys, laundry and shoes. Keep the stairs well lit.
- Supervision. Ottawa Public Health is clear that gates are not a substitute for an adult keeping the child in view.
- Visible edges. InterNACHI notes that handrails should contrast with their background to improve visibility. If you are redecorating, these staircase painting ideas for colours and banisters can help you plan a scheme that keeps rails easy to see.
The gate keeps a child off the stairs when you cannot watch. The handrail helps once they are on the stairs with you, learning to climb. That is the gap we built KiddieRail to fill. For flats, our apartment stairs toddler safety guide shows how the pieces fit together, and our Airbnb childproof stairs page covers holiday lets.
Our view on retrofitting
Paul, from the KiddieRail team: most parents find out the hard way that a stair gate only solves half the problem. At some point your child will be on the stairs with you, and that is when they need something to hold that is actually within reach.
We designed KiddieRail to be added to the stairs you already have, below the standard handrail, and to adjust as your child grows. You do not need to replace a banister or hire a joiner. We have put it through testing for durability, and it is designed for any home staircase layout.
Our advice is simple. Measure first, fix into solid backing, set the height to your child’s reach and keep your gates in place. A rail that fits well and holds firm gives a toddler confidence, and confidence is what helps them learn to take the stairs safely.
Paul
Get the right KiddieRail for your stairs
If your staircase suits a retrofit, the KiddieRail Adjustable Child Stair Handrail is our award-winning, fully adjustable rail, designed to grow with your child and fit below your existing handrail. For longer flights, add an extension pack of 85 cm or 170 cm, priced from £24.99 to £36.99.
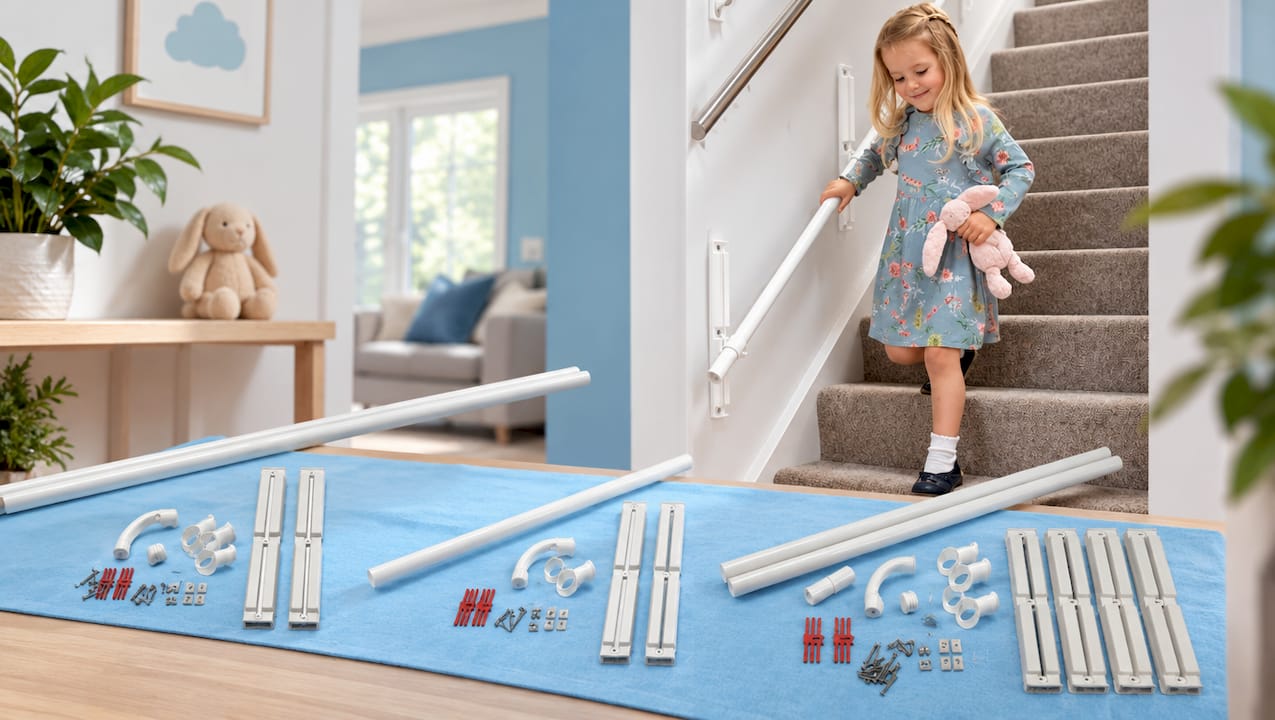
Browse the full range in our shop and measure your stairs before you order.
FAQ
Can I add a child handrail without replacing my banister?
Yes. A retrofit rail is designed to be added below the existing handrail, so the banister stays as it is. Make sure it is fixed into solid backing and does not leave a gap wider than 100 mm between the rails and the stairs.
What height should a child handrail be?
Set it at the height your child can grip with a relaxed arm. For many toddlers that falls in the 600 to 750 mm range above the stair nosings, which is the range our adjustable rail covers. Check it again as your child grows.
Do I still need a stair gate if I fit a child handrail?
Yes. A rail helps a child who is on the stairs, while a gate stops them reaching the stairs unsupervised. RoSPA advises wall-mounted gates at the top and bottom for children under 24 months, and Ottawa Public Health stresses that gates do not replace supervision.
Can I fit a child handrail to a plasterboard wall?
Only with solid backing behind the plasterboard. Locate the studs and fix into them, or screw a timber backing board to the studs and mount the rail on that. Test the finished rail with a firm pull before your child uses it.
Sources
- US Patent 5,853,166: Handrail assembly for children
- Risk and protective factors for falls on stairs in young children (BMJ, 2016)
- RoSPA: Keeping Kids Safe, Falls
- US Access Board: Chapter 5, Stairways
- Family Handyman: Install a New Stair Handrail
- InterNACHI: Stairway Inspection
- Ottawa Public Health: Child Falls
- Staircase Painting Ideas: Colours, Patterns and Banisters


