
Currently Empty: £0.00


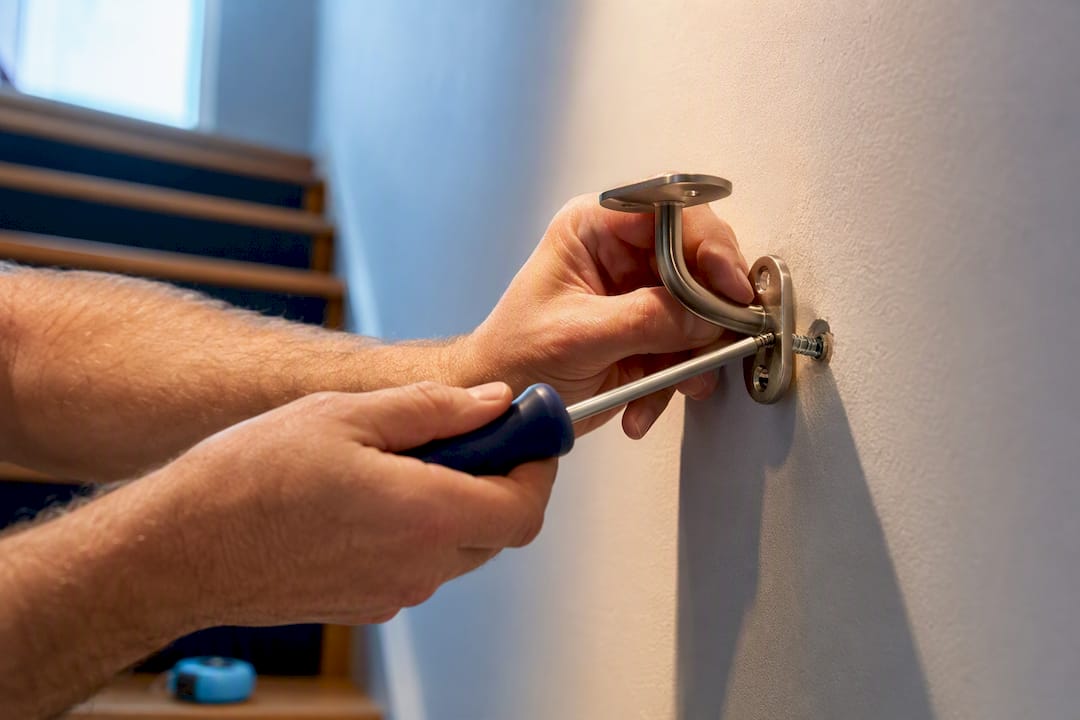
Hit a stud or blocking with a wood screw whenever you can. When you can’t, a heavy-duty toggle anchor like Snaptoggle beats every other hollow-wall fixing for handrail loads, and a masonry anchor is the right call on brick or block. For a child’s handrail, follow the manufacturer’s bracket spacing, use the largest anchor the bracket allows, and pull-test every fixing before anyone relies on it. Never mount a rail with only a lightweight plastic anchor.
TL;DR:
- Proper backing such as studs or blocking is essential for long-term safety and should be prioritized over relying solely on hollow-wall anchors.
- Heavy-duty toggle anchors like Snaptoggle are rated for repeated dynamic loads typical of handrails in drywall or plasterboard walls, unlike lightweight plastic anchors.
- Masonry anchors are necessary for brick or concrete walls, with bolt size and length matching the bracket’s specifications to ensure strong fixation.
- For metal stud walls, self-tapping or specialized toggle bolts rated for steel are required, and drywall anchors alone are insufficient for support.
- Conduct pull tests on every fixing after installation, and consider using additional anchor points or backing plates if anchors pull out or crumbling plaster occurs.
Table of Contents
- Choosing the right handrail wall anchors for your wall type
- How do I find studs before fitting a handrail?
- Step-by-step handrail bracket installation
- What to do when a handrail anchor pulls out of the wall
- How much weight should a handrail bracket hold?
- How KiddieRail products use the same anchor principles
- What conventional handrail advice gets wrong
- Fit your child’s handrail with confidence, not guesswork
- Sources
- FAQ
Choosing the right handrail wall anchors for your wall type
The anchor you need depends entirely on what’s behind the plaster or plasterboard, not on what happens to be in the tool drawer. Handrails take repeated dynamic loads, often a sudden downward yank rather than a steady push, so the fixing has to handle shock, not just static weight.
For hollow stud or drywall walls, a heavy-duty toggle anchor is the standard choice when you can’t hit timber. CRL’s Snaptoggle is built specifically for gypsum board, plaster, and cement board, and it’s rated for heavy fixtures such as grab bars and handrails rather than picture frames. Traditional spring toggle bolts work too, and trade suppliers commonly rate them for loads suitable for handrail support in typical wall setups, though that figure shifts with wall thickness and bolt size. Molly bolts (self-drilling hollow-wall anchors) suit lighter brackets but aren’t the first choice for a rail that takes a full body weight pulling sideways.
Solid masonry walls need a different family entirely. Concrete or masonry anchors, sold in sizes like 3/8-16 or 5/16-18 thread, are made to hold heavy railing hardware directly into brick, block, or poured concrete, as CRL’s own handrail anchor range shows.
Bracket bolt sizing matters as much as anchor choice:
- Most handrail brackets take M8 or M10 bolts, roughly equivalent to 5/16 or 3/8 inch.
- Toggle anchors are usually sold with the anchor and bolt as separate purchases, so check the bracket’s bolt diameter before you buy toggles.
- A Snaptoggle-style bolt sized M8 x 100mm is a common spec for steel-stud fixing and lists its own drilled hole diameter and hold range on the packaging.
- Standard wood screws for stud fixing are typically 3 inch (75mm), long enough to bite well into timber behind 5mm plasterboard.
Pro Tip: Buy one extra toggle anchor per bracket position. If you drop the metal toggle wing inside the wall cavity during installation, you’ll need a spare rather than an emergency trip to the shop.
Metal-stud walls deserve a separate note. Ordinary wood screws won’t bite properly into thin steel studs, so you need self-tapping screws or specialised toggle bolts rated for steel, not timber-focused hardware. If your home has metal-framed partition walls (common in newer builds and converted flats), check the stud material before buying anchors.
How do I find studs before fitting a handrail?
Finding solid backing is the single step that determines whether your rail lasts five years or fails in five months. Everything else, anchor choice, bolt length, torque, is secondary to whether there’s real timber or a proper anchor holding the load.
Start with an electronic stud finder, but don’t trust it blindly on older plaster walls, where lath and inconsistent plaster thickness confuse the sensors. Cross-check with these methods:
- Tap along the wall at hand height. A dull thud usually means stud; a hollow knock means cavity.
- Measure from an internal corner. Studs are commonly spaced at 16 or 24 inch centres in timber-framed homes, so once you find one, the rest are often predictable.
- Look for existing clues: skirting board nail lines, light switch positions, and visible screw heads in the plaster often sit on studs.
- Drill a small pilot hole in an inconspicuous spot and feel for resistance with a bent wire if you’re still unsure.
When the stud spacing doesn’t line up with your ideal bracket positions, which happens more often than not on a diagonal stair run, you have two solid options. The first is fitting horizontal blocking (a length of timber fixed between two studs) so you create a continuous strip of solid backing at the exact height you need. You can often access the stud cavity from behind, through a loft space or an adjoining room, without cutting into the finished plaster face at all.
The second is a timber ledger board screwed directly into whatever studs you can reach, then bolting the handrail bracket through the ledger rather than through a single anchor point. Fine Homebuilding’s own installation guidance leans firmly towards locating studs or adding blocking rather than relying on hollow-wall anchors as a first resort, precisely because timber backing outperforms even the best toggle over years of use.
If accessing the cavity means cutting a large section of lath and plaster on an older wall, or the wall turns out to be structurally unusual, that’s the point to bring in a carpenter or handyman rather than guessing.
Step-by-step handrail bracket installation
Getting the sequence right matters more than rushing to the drilling stage. Skipping the measurement and verification steps is where most DIY rail failures start.
- Mark a level line at your chosen rail height using a spirit level or laser level, not just a tape measure at intervals, since stairs rarely follow a perfectly consistent pitch.
- Mark bracket positions along that line, spacing them according to the bracket manufacturer’s guidance (commonly every 900mm to 1.2 metres for standard adult rails).
- Verify backing at every mark using the stud-finding methods above before you drill anything.
- Drill pilot holes matched to your anchor: Snaptoggle and similar heavy-duty toggles typically need a 12 to 14mm hole, while direct stud screws need a pilot slightly narrower than the screw shank.
- Fold and insert the toggle anchor, pull the strap until you feel the wings sit flat against the inside of the wall, then snap off the excess strap.
- Install the bolt through the bracket and into the anchor, tightening enough to seat the bracket firmly without crushing the plaster surface around the hole.
- Repeat at each marked position, checking the rail sits level once all brackets are loosely fitted before final tightening.
- Tighten every fixing fully, then apply a firm pull-test at each bracket.
For stud fixings, 3 inch wood screws through the bracket into timber give a strong, simple connection, a detail confirmed in SI Handrails’ own installation instructions, which also warn against trusting wall anchors alone without blocking behind them wherever that’s achievable.
A few things to check before you call the job finished:
- Screw or bolt length should pass through the plasterboard or plaster thickness (usually 12 to 15mm) plus enough engagement into the stud or anchor, generally a minimum of 25mm of thread bite into solid timber.
- Don’t overtighten toggle bolts. Crushed plasterboard around the anchor point weakens the fixing rather than strengthening it.
- Check every bracket sits flush against the wall. A gap means the wall surface isn’t flat or the anchor hasn’t fully seated.
- Recheck rail level once all brackets are torqued down, since final tightening can shift alignment slightly.
One advantage of Snaptoggle-style anchors is that you can pre-install the anchor itself without the bolt, which stops it spinning loose inside the cavity while you position the bracket. That small detail saves real frustration on a job with several bracket positions to align.
What to do when a handrail anchor pulls out of the wall
A pulled-out anchor almost always means one of three things: the anchor was undersized for the load, it wasn’t seated against real backing, or the plaster around it has crumbled from repeated stress. Fixing it properly means addressing the cause, not just plugging the hole.
Start by removing any remaining anchor debris from the hole. If the hole has enlarged beyond what a new anchor of the same size can grip, don’t just force a new toggle into a wallowed-out cavity. Common repair routes:
- Step up to a larger toggle anchor with a bigger hole diameter, which gives fresh, undamaged plaster or board to grip.
- Fit a metal or plywood backing plate behind the bracket, spreading the load across a wider area of wall rather than one point.
- Patch the damaged plaster with filler first, let it cure fully, then drill fresh and slightly offset from the original hole if the substrate feels soft.
- Cut a small access panel and add a section of timber blocking behind the failure point, then patch over once the new fixing is proven solid.
Pro Tip: If more than one anchor has failed on the same rail, don’t just fix each one individually. That pattern usually means the whole rail was under-anchored from the start, and it’s worth reinstalling with blocking behind every bracket rather than repeating the same mistake with bigger toggles.
Soft, crumbling plaster around a failed fixing point often signals a deeper problem: old lime plaster losing cohesion, damp damage, or a substrate that was never sound. In that case, patching the hole won’t hold long term, and a small area of plaster or board replacement is the honest fix.
Preventative habits are worth building in from day one. Re-check every bracket for tightness roughly a week after installation, since fresh plasterboard anchors can settle slightly under initial load. Adding one extra fixing point beyond the manufacturer’s minimum spacing costs very little and adds real margin, especially on a rail children will pull on daily.
How much weight should a handrail bracket hold?
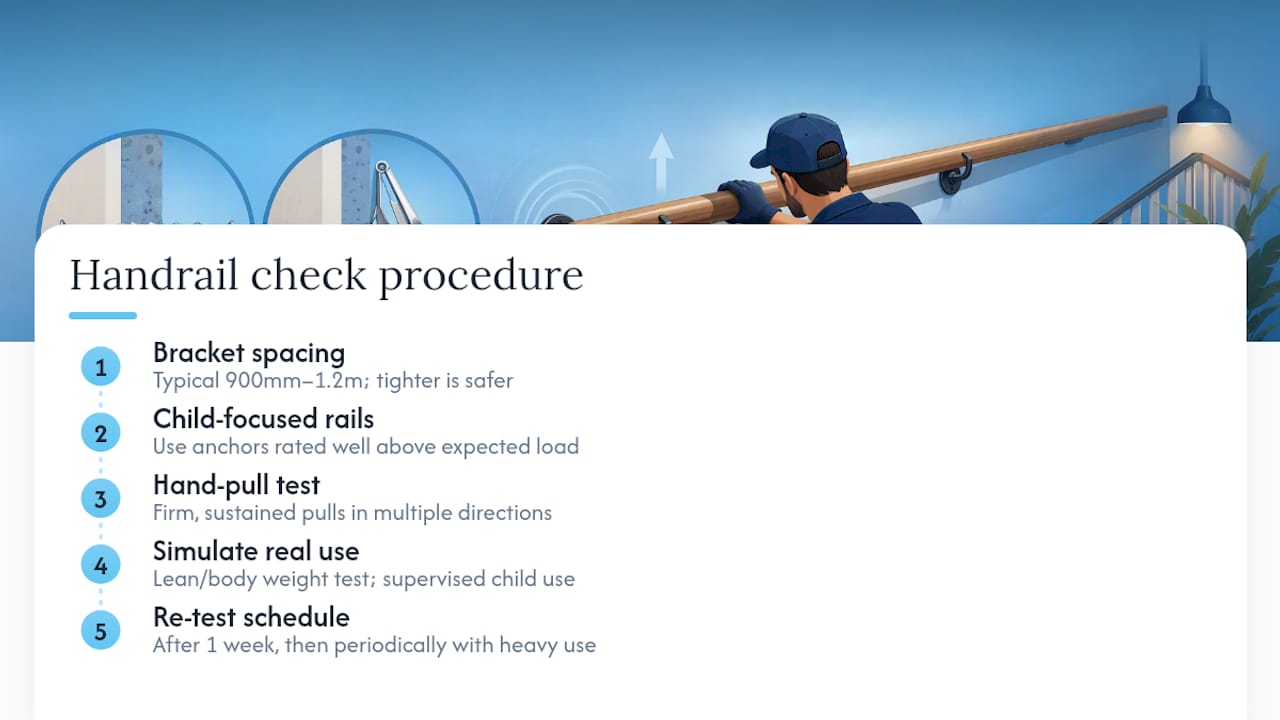
Bracket spacing and fixing count should never be treated as a minimum to scrape past. For a standard adult stair rail, brackets every 900mm to 1.2 metres is typical, but tighter spacing, and more fixings overall, gives a stiffer, safer rail with less flex under load.
For a child-focused handrail, load expectations differ from an adult rail, since the forces come from a lighter body weight but often at a more erratic angle as a toddler grabs, swings, or leans hard sideways. That’s exactly why over-engineering the fixing, using an anchor rated well beyond the expected load, is the right instinct rather than overkill.
Testing is simple and takes minutes. Apply a firm, sustained hand-pull on each bracket in multiple directions, not just straight down. Then simulate real use: step near the rail and apply body weight leaning into it, and where a child will use it, have them use it normally under supervision and watch for any flex, creak, or movement at the wall plate. Any movement at the bracket itself, rather than slight flex in the rail material, means a fixing needs attention immediately, not on a future to-do list.
Re-test after the first week of regular use, then periodically after that, particularly in households where the rail sees heavy daily traffic from young children learning the stairs.
How KiddieRail products use the same anchor principles
Everything above applies directly to fitting a KiddieRail Adjustable Child Stair Handrail, which mounts below the existing adult rail at a height suited to a young child’s reach and grip. KiddieRail sells this as its core product because a standard adult handrail sits too high for most toddlers and young children to use safely and independently, leaving a genuine gap in stair safety that a stair gate alone doesn’t solve.
The rail is built to adjust as a child grows and has been tested for durability under repeated use by young children learning to manage stairs. The anchor guidance in this article, finding studs first, sizing toggles correctly when studs aren’t available, and pull-testing every bracket, applies strongly to a child rail as well as an adult one, since a smaller person pulling hard sideways can stress a fixing similarly to an adult leaning on it.
Longer staircases or unusual layouts often need more coverage than the base unit provides. That’s where the KiddieRail Extension Pack (Additional 85cm/33.4inch Length) or the KiddieRail Extension Pack (Additional 170cm/66.9inch Length) extend the rail’s reach for a longer flight, using the same bracket and anchoring approach as the main unit.
What conventional handrail advice gets wrong
Most handrail guides treat anchor choice as the whole problem, when backing is the real variable that decides whether a fixing lasts. Plenty of DIY articles list five anchor types and stop there, without pushing readers to actually locate studs first or consider blocking when studs miss the mark.
The other gap is honesty about plaster. Older lime plaster and lath walls behave nothing like modern plasterboard, and advice written for new-build drywall can quietly fail on a Victorian stair wall. If your home predates the 1950s, treat every anchor spec with a bit more caution and lean harder towards blocking or a ledger rather than trusting a toggle rated for standard board.
For families fitting a child’s rail specifically, I’d push back on treating this as a lighter-duty job because the user is smaller. A determined three-year-old swinging on a rail generates awkward, unpredictable loads, not gentle ones. Prioritise finding real backing over convenience, oversize the anchor rather than matching it exactly to the bracket spec, and test every fixing properly before trusting it with a child on the stairs.
— Paul
Fit your child’s handrail with confidence, not guesswork
A child handrail that is adjustable offers a practical alternative to leaving young children without a rail they can actually reach and use. Rather than relying on a stair gate that blocks access entirely, an adjustable child handrail lets kids build real stair confidence at a height that fits them, and it grows with the child instead of needing full replacement.

The KiddieRail Adjustable Child Stair Handrail fits below your existing rail and suits most standard stair runs straight out of the box. For longer staircases, add the 85cm extension pack or the 170cm extension pack, priced between £24.99 and £36.99 depending on length, to cover the full flight. Use the anchor and stud-finding guidance above during installation, whether you’re fixing into modern plasterboard or older plaster and lath.
Ready to fit one? Head to the KiddieRail shop to check current pricing and pick the right length for your stairs, or browse the extension pack range if you already own the base unit and just need more coverage.
Sources
For exact hole sizes, load ratings, and installation notes, go straight to the manufacturer’s own product pages rather than relying on general advice alone.
- CRL Snaptoggle® 1/4" – 20 Toggle Anchor
- How to Anchor Heavy Objects to the Wall Like a Pro
- How to install a second wall-mounted handrail — SI Handrails
Since stair-safety concerns often extend beyond the rail itself, it’s also worth reviewing stair runner safety practices if your staircase has a fitted runner or loose treads alongside the handrail work. Always check the specific manufacturer’s instructions for whichever anchor you buy, since hole sizes and torque limits vary between brands even within the same anchor type.
FAQ
How do I securely anchor a handrail to the wall?
Locate studs or existing blocking first and fix directly into timber with a 3 inch wood screw wherever possible. Where studs aren’t accessible, use a heavy-duty toggle anchor like Snaptoggle, sized to the bracket’s bolt diameter, and pull-test the fixing before use.
What are the best drywall anchors for hanging a handrail?
Heavy-duty toggle anchors, particularly Snaptoggle-style designs, are the standard choice for drywall since they’re rated for fixtures that take repeated, dynamic loads. Standard plastic wall plugs or lightweight molly bolts aren’t strong enough for a handrail that someone might pull their full weight against.
How do I fix a handrail to a plasterboard wall?
Find the stud line behind the plasterboard and screw directly into it wherever your bracket spacing allows. Where a bracket falls between studs, install horizontal blocking behind the board first, or use a toggle anchor rated for gypsum board rather than a fixing designed for solid masonry.
Do handrail brackets need to be in a stud?
Not every bracket has to hit a stud, but at least some fixings along the rail should tie into solid timber or blocking for a load-bearing installation. Where a bracket genuinely can’t reach a stud, a heavy-duty toggle anchor rated for the wall material is an acceptable substitute, provided it’s correctly sized and pull-tested.
Is a KiddieRail child handrail installed the same way as a standard handrail?
Yes, the same anchor principles apply: locate backing where possible, use a properly sized anchor when you can’t, and test every bracket. The KiddieRail Adjustable Child Stair Handrail mounts below your existing rail using standard bracket fixings suited to drywall, plaster, or masonry walls.


